Written By


Alaska’s rivers are no joke. Beautiful, yes. Forgiving, no. If you’re planning to fish, hunt, or otherwise traverse Alaska’s lands and waters, there’s a good chance you’ll find yourself on a riverbank.
Do your Reconnaissance
You may be tempted to rush. Don’t. Take time to walk up and downstream. Locate the hazards. Standing waves can signal swift water and boulders or logs. Listen for submerged rocks rolling downstream. The bigger they are, the stronger the current. Never cross above rapids, falls or other hazards. Identify a safe exit point(s) on the other side before committing. The current will likely push you downstream as you cross. Plan accordingly.
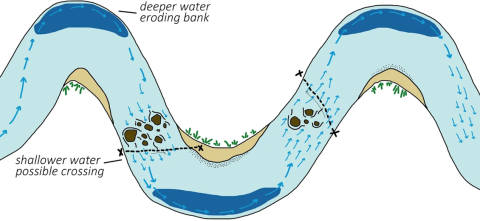
The safest places to cross tend to be straight sections between river bends, wider areas of the channel, or braids (multiple channels separated by temporary islands/bars). If you slip, the current’s likely to carry you to the outside of a bend. There, eroding banks and deeper water will make for a trickier exit than a shallow point bar. The swifter the current, the shallower it needs to be to safely cross. To test swiftness, throw a stick in and track how fast it travels downstream. Faster than you can walk? Probably unsafe to cross. To test depth, toss a rock in and listen for a hollow “ka-thump” (deep) or probe with a stick. Always thoroughly consider your skill and comfort level. If the crossing exceeds either, abort.

Timing is Everything
Before you go, get familiar with the river’s pattern of high and low flows, both seasonally and daily. When’s the rainy season? When does snow-pack melt at higher elevations? Is there rain in the forecast? Has it been especially hot and sunny in areas with glacially-fed streams? Is there a dam upstream that releases water at certain times of day? Is there a tidal influence downstream? The flow can rise quickly within a few hours on warm sunny days or after heavy rains, making a once-passable stream dangerously impassable. The U.S. Geological Survey’s National Water Information System is a great place to begin your assessment.
Preparing to Cross
Unbuckle your pack in case you have to ditch it. A secured pack can weigh you down and drag you under. While you’ll probably want to keep your boots on for traction, keep the rest of yourself as dry as possible. Consider removing your socks and pants. Keep them on top of your pack, or in a dry, sealed bag. If you’re wearing waders, be sure your belt is snug. If you have a personal flotation device (life jacket) make sure you’re 1) wearing it and 2) wearing it properly.
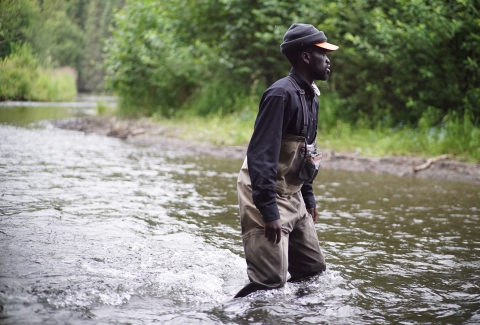
Body Position
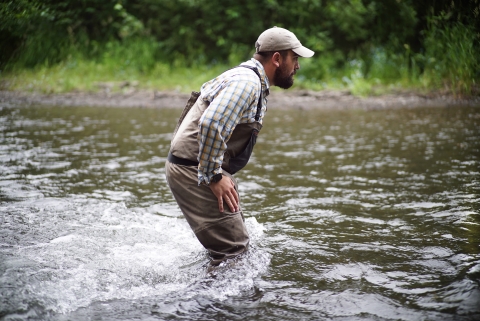
Face upstream, with the water flowing towards you. Lean forward slightly, keeping your feet shoulder width apart. Bend your knees to lower your center of gravity, especially if you have a pack on.
Crossing Solo
There are several techniques to use when crossing alone. One is the side-shuffle. Keeping your feet shoulder-width apart, face into a the current and move your outer foot into the channel. Once your footing is secure, slide the other foot towards it keeping your stance wide. Never cross your feet. Work your way across until you’re safely to the opposite shore.
You can also face the opposite bank, feet shoulder width apart, and lead with your downstream foot. Make sure it’s securely planted before taking a step with your upstream foot. For more stability, try the tripod method:
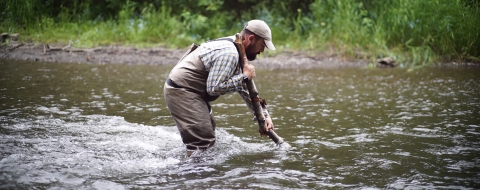
You’ll need to find a pole or branch that’s at least shoulder height so you can lean into it. It should be sturdy enough to hold your body weight. Lean forward and drag it along the bottom as you side-shuffle. Don’t lift it up. This may cause it to swing up in the current and go between your legs, possibly throwing you off balance or tripping you. Done properly, this method provides extra stability and a way to probe depth.
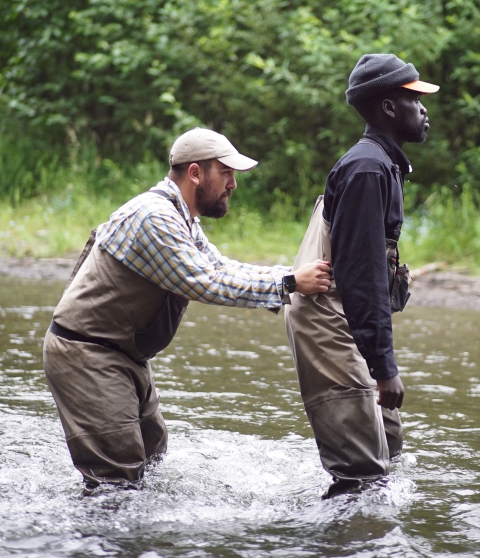
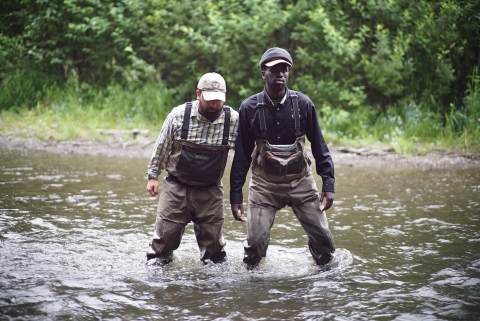
Crossing with a Group
Everything is the same as crossing solo except now you position yourself in relation to someone else while crossing. The stronger crosser should get in position upstream of the weaker companion. This lets them take advantage of their partner’s eddy — the aquatic equivalent of drafting behind a cyclist or birds flying in a V-formation. If more than two people are crossing, the weaker crosser(s) should be in the middle with the stronger companions up and downstream. If you’re traveling in a group, remember: you’re only as strong as your weakest link.

Correcting From a Fall
Should you slip and fall while crossing, try to stay calm. Flip onto your back in a floating position, pulling your knees into your chest. This will trap air in your pants or waders. Point your feet in the opposite direction you want to travel. Your feet will act as a rudder and catch the current. Use your hands to maneuver yourself.

Avoid swimming against current until you’re close enough to the bank where you can safely exit — ideally when your bottom is scraping riverbed to avoid any foot entrapment. At that point, flip over and swim the few final feet if needed, grabbing onto roots or the bank to pull yourself out. Don’t stand until you’re absolutely sure you can do so safely — you’ll burp the air in your waders. Once on shore, lay on your back to drain the water out of your waders by lifting your feet into the air.
Don’t Forget to Share Your “Float Plan”
Whether you’re traveling solo or in a group, always remember to let a responsible person know exactly where you’re going and when you plan to return in case an emergency arises.
A float plan should include: where you’re going, the detailed route, your planned departure and expected return time. It should also list the name, address, telephone number, and emergency contact for each person traveling. If you have a last minute change of plans, or will be delayed, make sure to notify the person holding your float plan.
Gear Recommendations
Personal Flotation Device (PFD/Life Jacket)
There have been over 6,500 river drownings in the U.S. since 2009. Wearing a life jacket is the biggest way you can decrease your drowning risk. It will give you more buoyancy to stay afloat. There are plenty of standard foam and inflatable PFDs options available that are great for anglers, hikers, and hunters planning to cross rivers. Make sure your PFD fits properly. Adult sizes are based on chest dimensions. To check the fit, have someone lift up on the shoulder straps. If it slides up past your nose, try tightening the straps or a smaller size.
Waders and Belt
Waders are a great way to keep your legs and lower torso dry. Neoprene waders can help keep you warm and breathable waders offer a cool alternative. Make sure the boots fit. Tight boots can make your feet cold and loose boots can trip you up. Note: felt-soled wading footwear is banned in some states (including Alaska) to reduce the risk of spreading invasive species invasive species
An invasive species is any plant or animal that has spread or been introduced into a new area where they are, or could, cause harm to the environment, economy, or human, animal, or plant health. Their unwelcome presence can destroy ecosystems and cost millions of dollars.
Learn more about invasive species
Polarized Sunglasses
These special lenses cut the glare of the sun on the water. This offers an additional tool to assess depth and hazards by allowing you to better see what’s below the surface. If you’re fishing, they also offer great protection from errant hooks.
Satellite Communication Device
If you’re planning to be in the backcountry or anywhere your cellular device doesn’t get reliable coverage. If you do find yourself in an emergency due to being unable to safely cross a river, or because you or a travel companion(s) have been swept downstream, these devices offer a communications lifeline. Practice using it before you go.
In Alaska we are shared stewards of world renowned natural resources and our nation’s last true wild places. Our hope is that each generation has the opportunity to live with, live from, discover and enjoy the wildness of this awe-inspiring land and the people who love and depend on it.
Follow us: Facebook Instagram Apple Podcasts X